 Wajdi Alkayal

Cascading Style Sheets (CSS) is a style sheet language used for describing the presentation of a document written in a markup language like HTML. CSS is a cornerstone technology of the World Wide Web, alongside HTML and Javascript. And, Magento, the #1 open-source eCommerce platform, also uses CSS to customize its interface.
In this article, we will talk about “How to custom CSS in Magento 2”, which helps you to customize all the styles in Magento such as layout, font-weight, color, background, etc. It can load some files like URL, CDN, library, etc.
In Magento 2, you can include custom CSS within Module or Theme. Usually, the stylesheets you include should be available for all store pages, you will include a CSS file in layout default_head_blocks.xml or specific load style with a layout for each page.
Include CSS in Module
In this example, we will create module Magenest_CustomCss, and add a default_head_blocks.xml file in the module’s view/frontend/layout folder, For custom CSS for a specific layout, we'll start with default_head_block.xml layout. It will apply to all pages in Magento.
<?xml version="1.0"?>
<page xmlns:xsi="http://www.w3.org/2001/XMLSchema-instance"  xsi:noNamespaceSchemaLocation="urn:magento:framework:View/Layout/etc/page_configuration.xsd">
	<head>
		<css src="Magenest_CustomCss::css/css-module.css"/>
	</head>
</page>

After that, add the web/css/source/less-custom.less file.

body {
    background: pink;
}
This is the result after clearing the cache by using this command: php bin/magento cache:flush

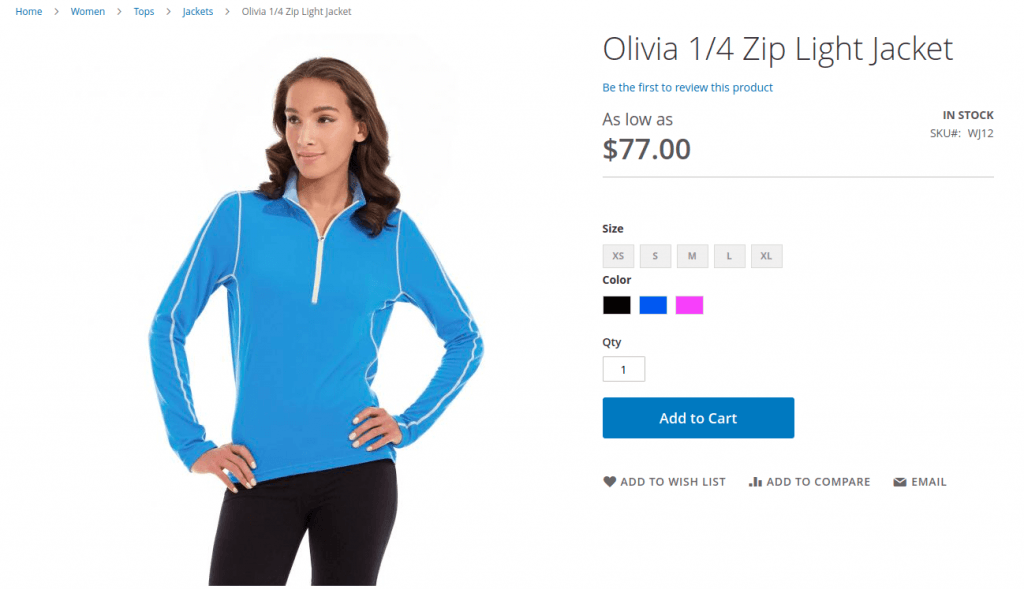
If you want custom CSS for specific layout, you need the layout of the page, which is a similar step for less file in module or theme. This is an example of catalog_product_view.xml:
<page xmlns:xsi="http://www.w3.org/2001/XMLSchema-instance"
      layout="2columns-left"
     xsi:noNamespaceSchemaLocation="urn:magento:framework:View/Layout/etc/page_configuration.xsd">
    <head>
        <css src="css/local.css" />
    </head>
</page>
And the result will look like the below picture:
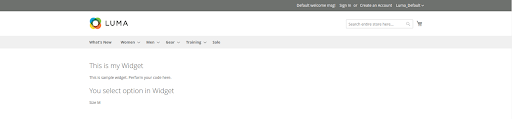
We can go in pages with layout homepage or catalog_product_view.xml
And catalog_product_view
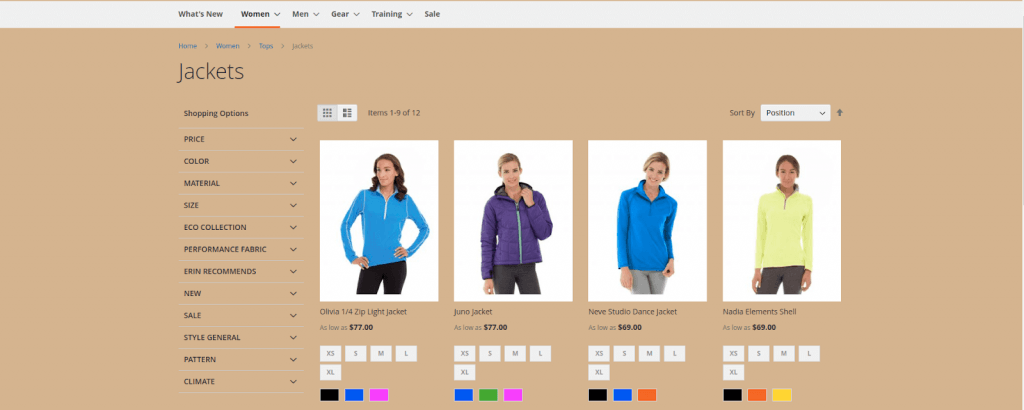
And finally, we will check in page has layout catalog_category_view.xml
Include CSS in Theme
The way to add CSS for Theme is similar to Module, but here there is a little bit of difference. It is the structure of the directory.
Step 1: You need to create file a css file in /app/design/frontend/<Vendor>/<Theme_Name>/web/css/local.css
Step 2: At this step, create default_head_blocks.xml file in
app/design/frontend/<Vendor>/<Theme_Name>/<Module_NameSpace>/layout/
Step 3: In default_head_blocks.xml, using css tag (<css>) to include a css file which we created at Step 2.
<page xmlns:xsi="http://www.w3.org/2001/XMLSchema-instance"
      layout="2columns-left"
      xsi:noNamespaceSchemaLocation="urn:magento:framework:View/Layout/etc/page_configuration.xsd">
    <head>
        <css src="css/local.css" />
    </head>
</page>

Step 4 : And add the below code in local.css file.

body {
    background: blue;
}
Step 4: Run clear cache command in the Magento root directory.
And the result will be like this: the background has changed to the blue color:

It's easy to create custom CSS files in Magento 2, right? We hope that you can use CSS to modify the Magento storefront for a better user experience.
How to customize css / xml / phtml / js files in Magento 2
In this article we'll be providing a few examples on how you can extend functionality and make adjustments for .css / .xml / .phtml / .js files in Magento 2.
The workflow and adjustments below are applicable to any Magento 2 extension and not limited to the Pearl Theme for Magento 2 that is used in this example.
Summary:
- Using a child theme for Magento 2 customizations.
- Magento 2 .css customization.
- Magento 2 .xml customization.
- Magento 2 .phtml customization.
- Magento 2 .js customization
- Add custom code in Footer and Head via Magento admin options
- Specific Pearl Theme CSS/JS options for individual Category Pages, Static Pages and Static Blocks.
- Additional Magento Customization not explained in the examples above
1. Using a child theme for Magento 2 customizations.
- It is recommended to make the necessary adjustments under a Child theme, in order to keep the Pearl Theme ( or other 3rd party extensions) update proof.
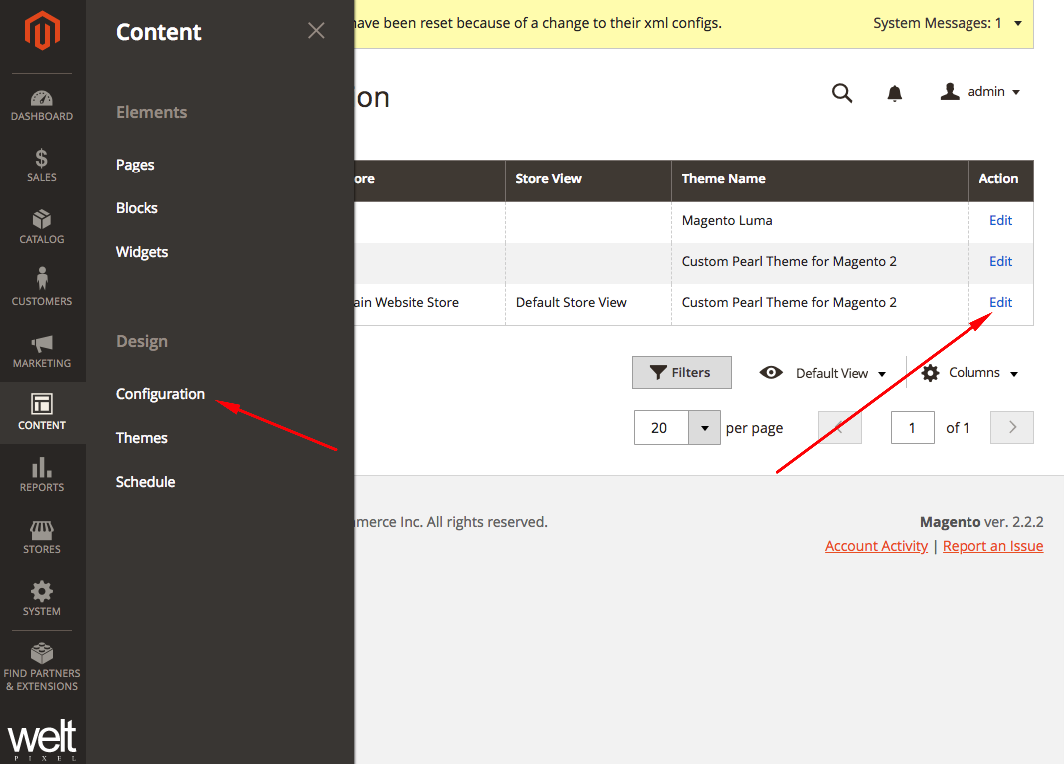
- The Pearl Theme Pack comes with a child theme that you can easily activate and add the necessary customizations to. You can enable the child theme from Admin > Content > Design > Configuration, chose Edit and select Custom Pearl Theme for Magento 2, for the desired store view.
Now, in app/design/frontend/Pearl/weltpixel_custom/web/css/source/wp_custom.less, you can add your custom CSS. By respecting Magento best practices and making all customizations in a child theme, Pearl Theme will always be update proof and you will not risk losing any of your changes.
2. Magento 2 .css customization.
Sometimes small changes are required in order to tailor the Pearl Theme or other 3rd party modules to fit your business requirements. The example below shows you the correct way to make CSS changes and keep the theme and extensions core update proof.
Custom Pearl Theme for Magento 2 CSS changes should be added in the file below:
app/design/frontend/Pearl/weltpixel_custom/web/css/source/wp_custom.less
Example of CSS customization in a Magento 2 child theme.
a. Add the code below to wp_custom.less as an example to hide the search box from the store header. Based on your needs, custom css can be added to this file.
.block-search { display: none; }
b. Regenerate Pearl Theme LESS/CSS and flush Magento Cache and changes should reflect in the storefront.
3. Magento 2 .xml customization.
Sometimes your project specifications require moving Magento elements, changing the location of the blocks or any other XML changes. In order to correctly implement this in a child theme, you should refer to the example below.
Example of XML changes in a Magento 2 child theme.
Let's suppose the project specifications require moving around some header elements in the header XML file. You can see the correct file structure in order to achieve this below.
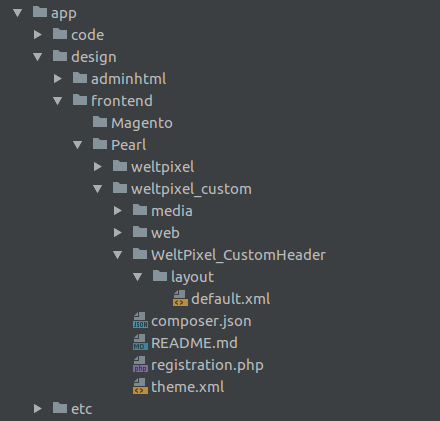
In the Pearl Theme, headers are handled under the app/code/WeltPixel_CustomHeader module, so we recreate this extension in the child theme (weltpixel_custom) with the complete XML path: app/design/frontend/Pearl/weltpixel_custom/WeltPixel_CustomHeader/layout/default.xml
- app/code/WeltPixel/CustomHeader <- original theme module, should not be modified
- app/design/frontend/Pearl/weltpixel_custom/WeltPixel_CustomHeader/layout/default.xml <- XML changes should be done here by adding the changes in this file, without the need to copy the contents of the original file.
You can see the child theme file structure in PHP Storm for this example below.
The default.xml file should look like in the example below, and in this example, the code added to the default.xml file removes the currency switcher.
<?xml version="1.0"?>
<page xmlns:xsi="http://www.w3.org/2001/XMLSchema-instance" xsi:noNamespaceSchemaLocation="urn:magento:framework:View/Layout/etc/page_configuration.xsd">
   <body>
      <referenceContainer name="header.container">
         <referenceContainer name="header-wrapper">
            <container name="header.right" as="header_right" label="Page Header Right"                  htmlTag="div" htmlClass="header_right" after="logo">
               <referenceBlock name="currency" remove="true"/>
            </container>
         </referenceContainer>
    </referenceContainer>
  </body>
</page>
Note: When modifying other 3rd party extensions, make sure to recreate the same extension directory structure under the child theme as in the original extension core.
! Regenerate Pearl Theme LESS/CSS and Magento Cache and the changes should reflect in the storefront.
Note: If you have existing layouts, other than the default.xml in your module, you might need to extend those layouts, instead of the default.xml as they can overwrite it.
For example, if you have the Header V2 is applied in the Admin section, you may need to extend the weltpixel_custom_header_v2.xml file instead.
4. Magento 2 .phtml customization.
Sometimes your project specifications require phtml changes in order to match your requirements. In order to edit a .phtml file, you should recreate the extension path under a child theme, and COPY the original .phtml file under the same location in the child theme.
You can edit the .phtml from the child theme as you wish without the risk of losing your changes in a Magento upgrade or Theme / Extension upgrade.
Example of PHTML changes in Magento 2 child theme.
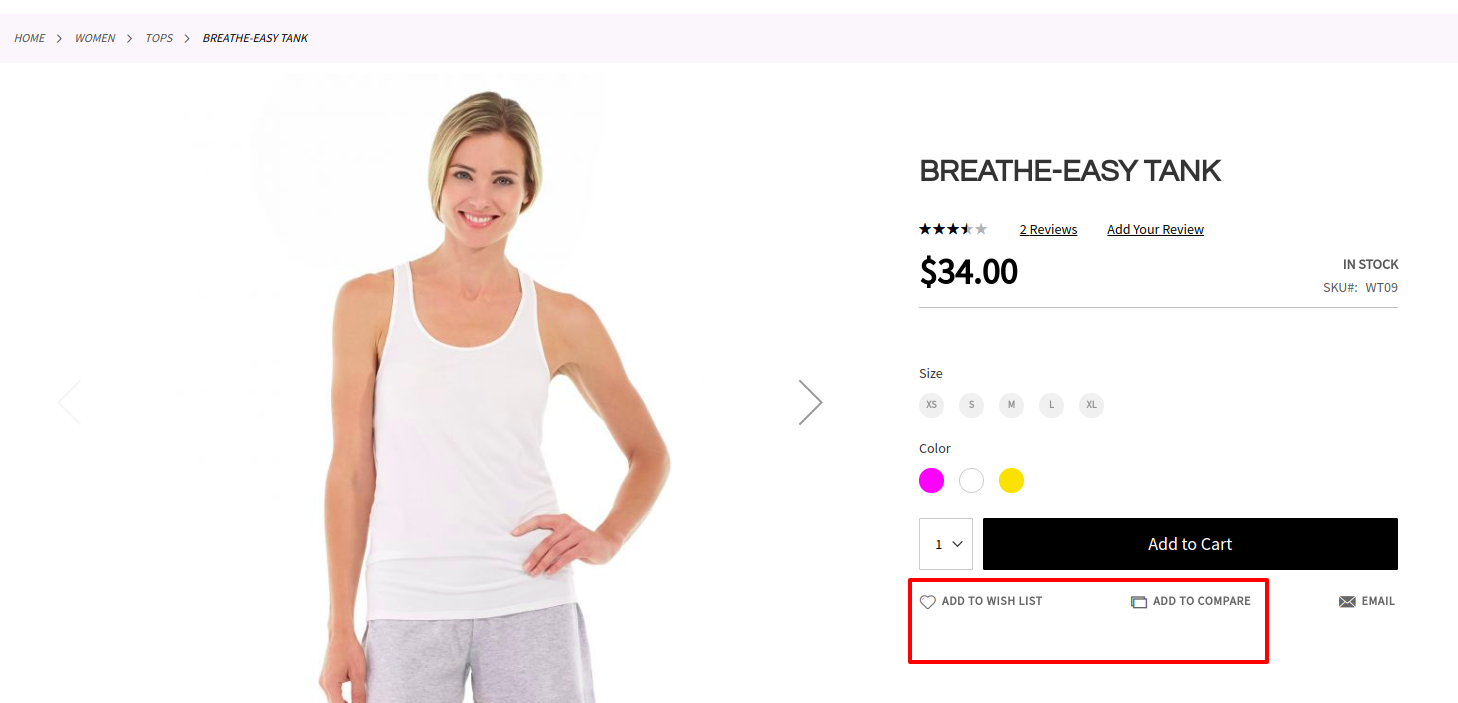
Let's suppose we need to invert the default position for Add to Wishlist and Add to Compare from Product Page.
In default Magento, 'Add to Wishlist' is the first element and 'Add to Compare' the second. We propose to invert the position of these 2 buttons by making a Product Page .phtml adjustment.
- Copy .phtml file FROM: app/code/WeltPixel/ProductPage/view/frontend/templates/product/view/addto.phtml
- Copy .phtml file TO: app/design/frontend/Pearl/weltpixel_custom/WeltPixel_ProductPage/templates/product/view/addto.phtml
You can see the child theme file structure in PHP Storm for this example below:
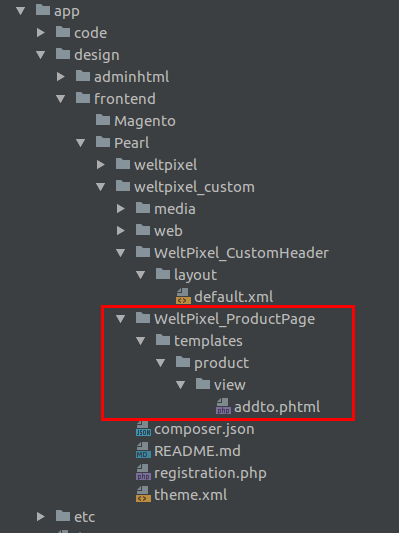
In the child theme addto.phtml we inverted the code sections associated with the buttons 'Add to Wishlist' and 'Add to Compare', making the compare button to display first.
<div class="product-addto-links <?php echo $addToCartClass; ?>" data-role="add-to-links">
<?php if (!$removeCompare) : ?>
<a href="#" data-post='<?php /* @escapeNotVerified */ echo $compareHelper->getPostDataParams($_product);?>'
data-role="add-to-links"
class="action tocompare"><span><?php /* @escapeNotVerified */ echo __('Add to Compare..') ?></span></a>
<?php endif; ?>
<?php if (!$removeWishlist && $this->helper('Magento\Wishlist\Helper\Data')->isAllow()) : ?>
<a href="#"
class="action towishlist"
data-post='<?php /* @escapeNotVerified */ echo $_wishlistSubmitParams; ?>'
data-action="add-to-wishlist"><span><?php /* @escapeNotVerified */ echo __('Add to Wish List') ?></span></a>
<?php endif; ?>
</div>
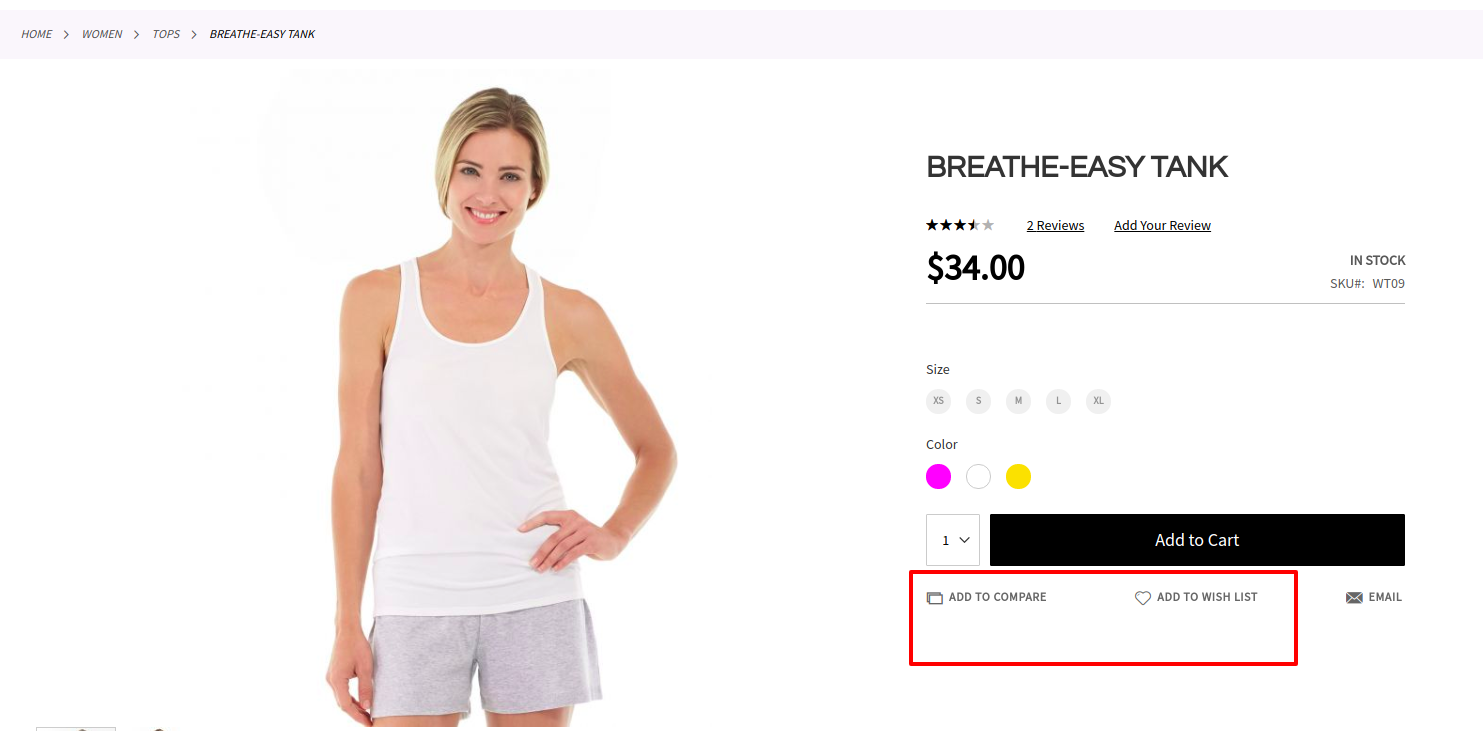
! Regenerate Pearl Theme LESS/CSS and flush Magento Cache and the changes should reflect in storefront.
5. Magento 2 .js customization
Sometimes your project specifications require adding a specific .js customization, please find an example on how to do this using a custom module in Magento 2 below.
Download a SampleCustomModule from the previous link with the correct file structure to serve as an example.
Installation of the sample module:
- copy the module under app/code/
- php bin/magento module:enable Custom_Js --clear-static-content
- php bin/magento setup:upgrade
- php bin/magento ca:cl
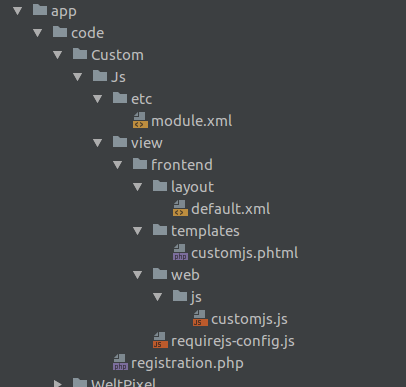
Add the custom .js code to app/code/Custom/Js/view/frontend/web/js/customjs.js
Example of a custom module file structure that adds a custom .js file to your Magento 2 installation
6. Add custom code the in Footer and Head via Magento Admin options
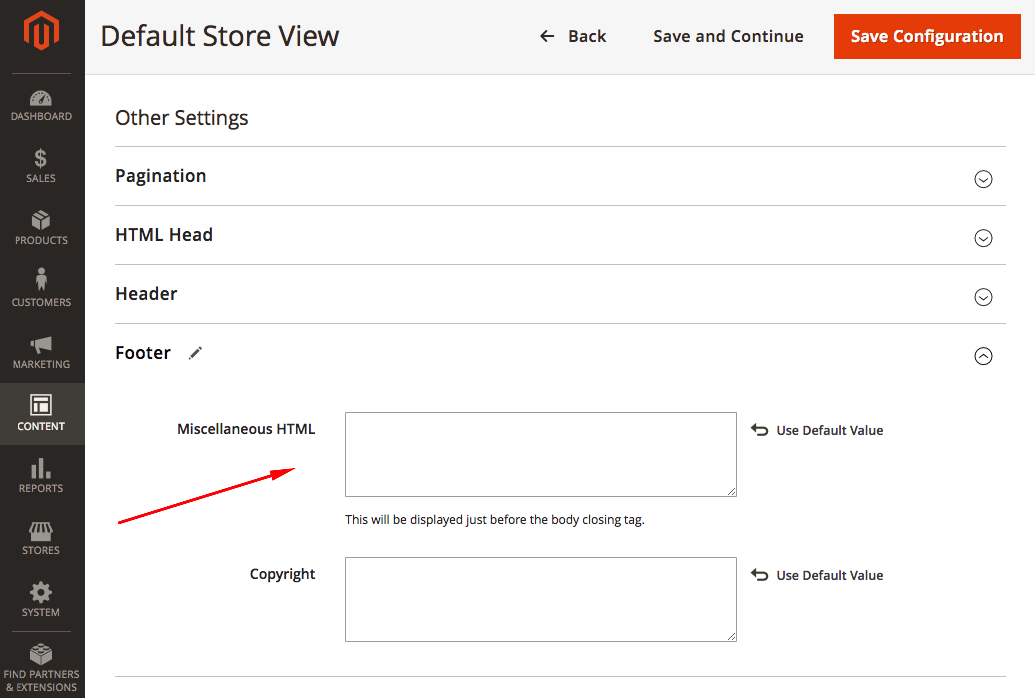
a. Footer custom code Miscellaneous HTML
Go to Content > Configuration > [ Edit Store view] > Footer > Miscellaneous HTML
You can add custom HTML, CSS, JS code that will be included in store footer here.
<style>
#block-shipping {
display: none;
}
</style>
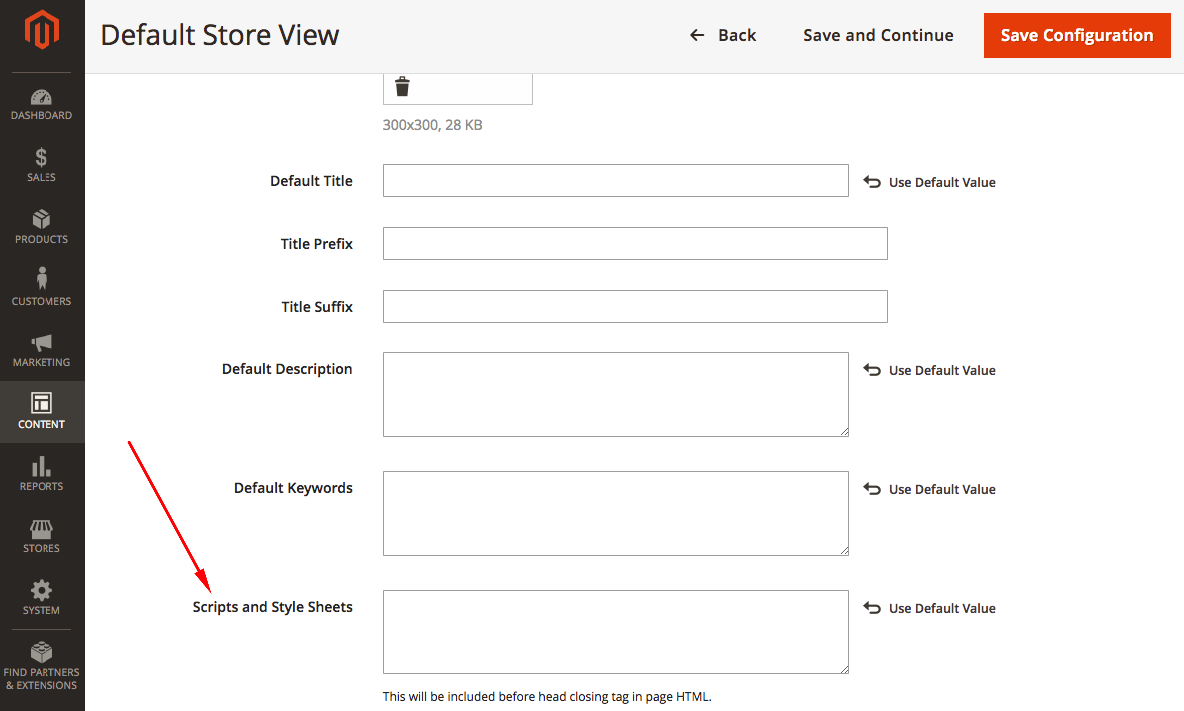
b. Head custom code Scripts and Style Sheets
Go to Content > Configuration > [ Edit Store view] > HTML Head > Scripts and Style Sheets
You can add custom HTML, CSS, JS code that will be included before the store Head closing tag in the page HTML here.
<style>
#block-shipping {
display: none;
}
</style>
7. Specific Pearl Theme CSS/JS options for individual Category Pages, Static Pages and Static Blocks.
Custom CSS can also be applied directly in Magento admin using Pearl Theme options. You can apply the customizations globally for all resolutions or for specific breakpoints where adjustments are necessary.
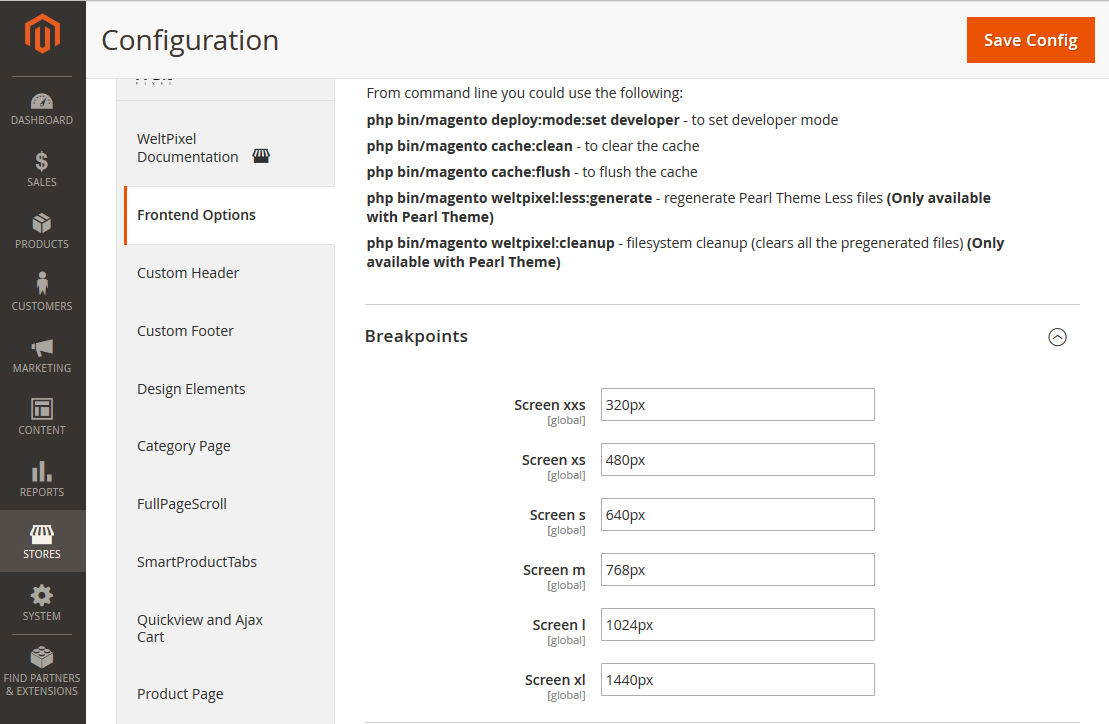
Breakpoints can be set in WeltPixel -> Frontend options -> Breakpoints.
These options allow you to customize CSS and JS for multiple screen sizes, to perfectly match your desired design for a wide range of devices.
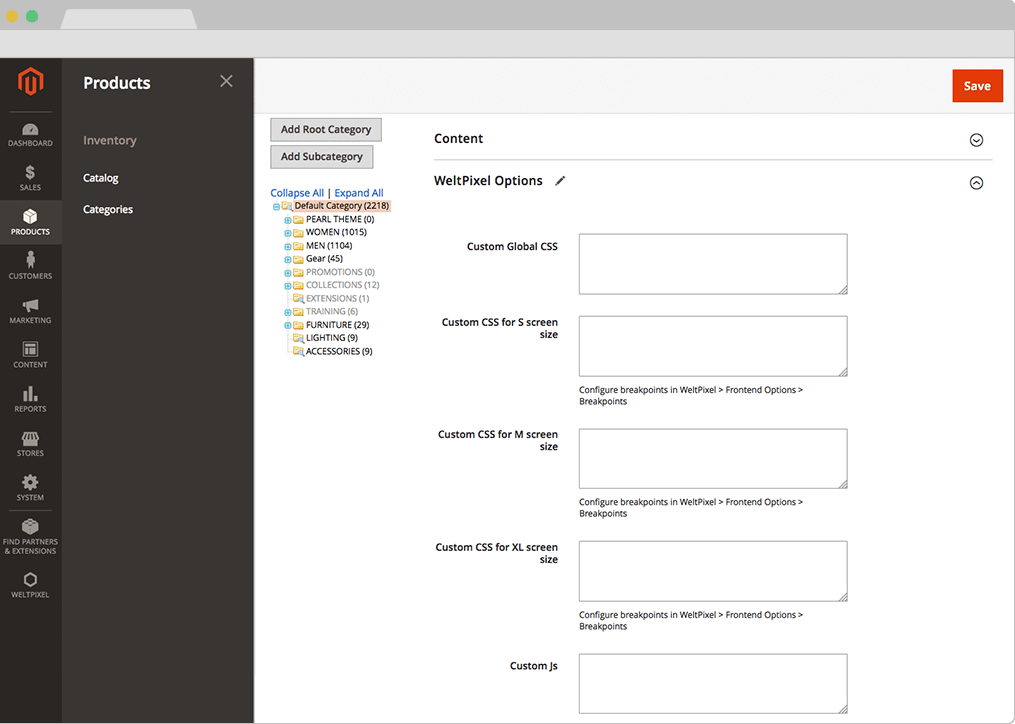
a. Add CSS / JS to an individual category page
It is easy to add simple customizations by inserting your CSS and JS code in a few fields introduced by the the Pearl theme in your Admin backend on the category page, for each previously defined breakpoint. Custom Global CSS will apply the customization for all breakpoints. It's not mandatory to define all 6 breakpoints.
You can add your own Custom CSS and JS for each individual category page, allowing you to have enhanced control of the listing pages.
Your Custom CSS for category pages can be inserted in Products -> Categories -> [desired category] -> WeltPixel options.
NOTE1: By default, if you apply custom CSS for a certain breakpoint, this custom CSS will also be applied for remaining screen sizes greater than the current one, where the CSS was added.
NOTE2: If you want to make customizations FOR ALL category pages, you should target the class that is used on all category pages and add the custom CSS to the child theme, as explained in chapter 2. Magento 2 .css customization above.
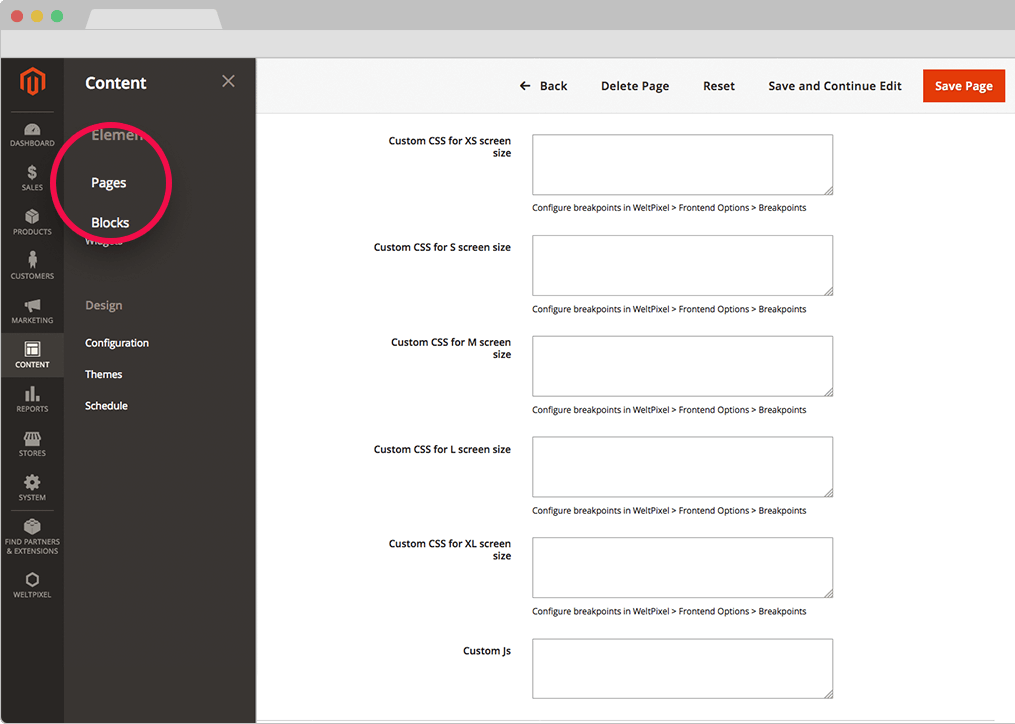
b. Add CSS / JS to individual static pages
Your Custom CSS and JS for static pages can be inserted in Content -> Pages -> [edit desired page] -> Design, for each static page.
NOTE1: By default, if you apply custom CSS for a certain breakpoint, this custom CSS will also be applied for remaining screen sizes greater than the current one, where the CSS was added.
NOTE2: If you want to make customizations FOR ALL static pages, you should target the class that is used on all static pages and add the custom CSS in the child theme, as explained in chapter 2. Magento 2 .css customization above.
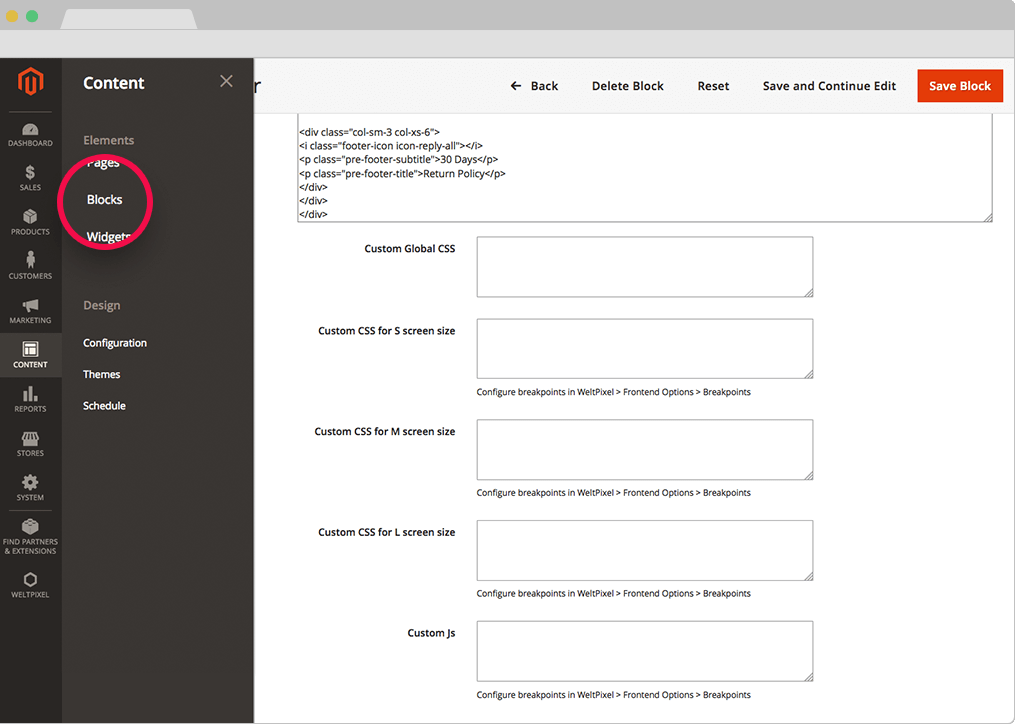
c. Add CSS / JS to static Blocks
Your Custom CSS and JS for static blocks can be inserted in Content -> Blocks -> [edit desired block] and right below the Magento editor you can find the fields for the custom CSS and JS.
NOTE1: By default, if you apply custom CSS for a certain breakpoint, this custom CSS will also be applied for remaining screen sizes greater than the current one, where the CSS was added.
NOTE2: If you want to make customizations FOR ALL static blocks , you should target the class that is used on all static blocks and add the custom CSS to the child theme, as explained in the chapter below: "Complex Customizations In a Child Theme"
8. Additional Magento Customization not explained in the examples above
For more details on how to develop custom modules, please consult the Magento documentation: Magento Developer Guide


