 Wajdi Alkayal

Step 1: Getting started: select solution
There are some solutions we can get started with.
- Install from Zip file: Easy installation, no command line.
- Metapackage: Use Composer to install Magento
- Install from Git repository: Contributing developer
In this guide, we will show how to install as the #1 solution. It is easy to get started.
- Prerequisites Before you continue, make sure you’ve finished all of the following:
- Set up a server that meets our system requirements
- Create the Magento file system owner
Step 2: Install Magento 2 Step by Step
- Download Magento packages
- Upload to your server
- Update permission
- Running the Magento Setup Wizard
- Finish installation process
2.1. Download Magento packages
2.2. Upload to your server
Let’s download a zip file and now time to upload it to the server. You can use WinSCP, Filezilla to upload it to the server, then extract it to public_html directory (let’s call it: Magento root directory).
- If you are using shared hosting, you can use unzip/extract feature to extract the Magento package.
- If you are running on your server, let follow the commands:
File format and command
# File .tar.gz
tar zxf <filename>

# File .zip
unzip <filename>
Update permission
Add write permission for the following folders: var, app/etc, pub by running below command line:
chmod 777 -R var
chmod 777 -R app/etc
chmod 777 -R pub
You may get this error if it does not have permission.
2.3. Running the Magento Setup Wizard
The Setup Wizard is a multi-page wizard that enables you to go back and forward one page at a time. You cannot skip pages, and you must enter all required information on every single page before you can proceed to the next page.
- Enter the following URL in your browser address bar: http://www.example.com/magento2. example.com is your domain name such as: localhost, localhost.com, 127.0.0.1 or your staging domain. magento2 is Magento 2 folder in htdocs Usually, it is http://localhost/magento2.
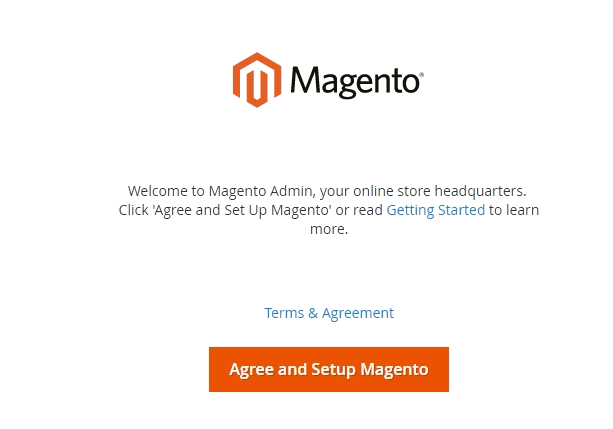
- On the initial page, click Agree and Set Up Magento. Continue with the following topics in the order presented to complete the installation.
2.3.1. Readiness Check
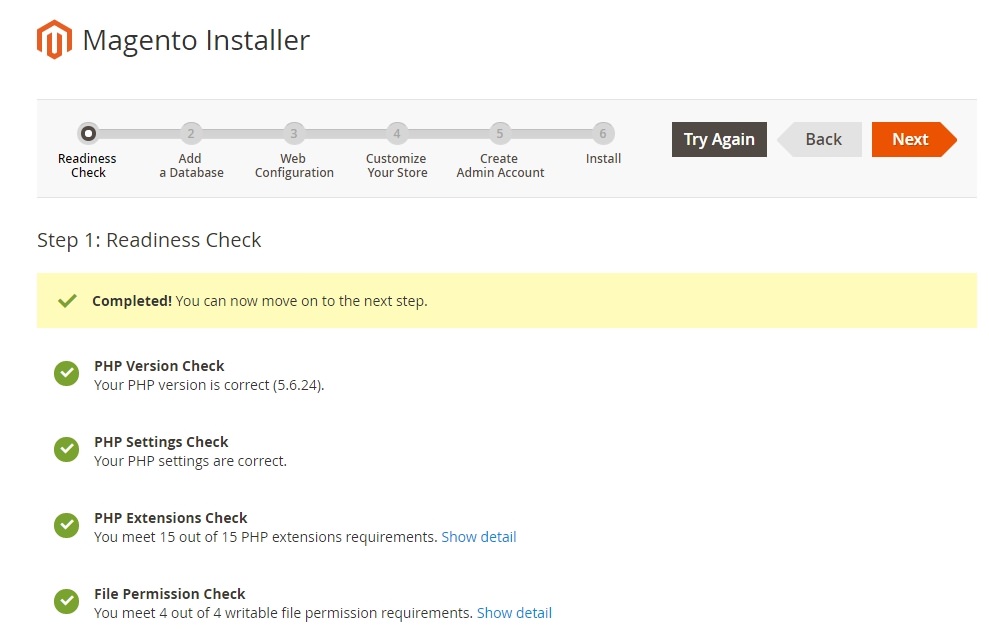
- Click Start Readiness Check. If any errors are displayed, you must resolve them before you continue. Click More detail if available to see more information about each check.
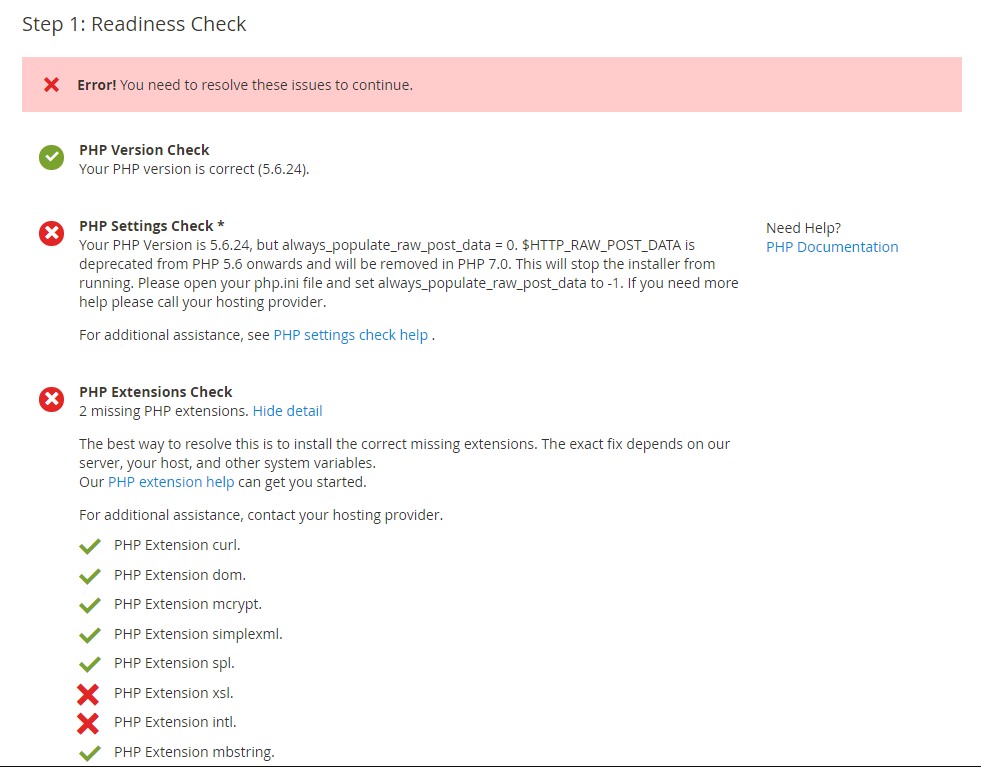
- Click Next
2.3.2 Add a Database
Fill database information then click Next
2.3.3 Web Configuration
- Enter the following information:
- Your Store Address: http://www.example.com
- Magento Admin Address: Enter the relative URL by which to access the Magento Admin. e.g: secret, backend
- Then click Next
2.3.4. Customize Your Store
- From the Store Default Time Zone list, click the name of your store’s time zone.
- From the Store Default Currency list, click the default currency to use in your store.
- From the Store Default Language list, click the default language to use in your store.
- Expand Advanced Modules Configuration to optionally enable or disable modules before you install the Magento software.

Click Next
Important!: Use Skip dependency check for individual modules with caution. We recommend against it because a typical reason for this error is you manually edited the deployment configuration. Editing the deployment configuration is not recommended because future Magento software updates can undo your changes.
2.3.5. Create Admin Account
Now enter admin information such as
- New Username
- New E-Mail
- New Password
- Confirm Password
- Then click Next
2.3.6. Install

After completing all previous steps in the Setup Wizard, click Install Now.
Installation Success The message Success will be displayed to indicate a successful installation.
Step 3: Check the result
Now go to the frontend and backend to see the result
Frontend

Backend

Conclusion
Installing your Magento 2 store using Sample data could be a great approach, as it allows you to test beforehand how the store looks and operates. It also helps to check the changes after installing new extensions or running an update. This guide has shown you how to install sample data for your Magento 2 store, and if you want to discover other Magento 2 related topics, check the below recommendations from us. And don’t forget to leave comments as you go!


