 Wajdi Alkayal

Tutorial: Get started with C# and ASP.NET Core in Visual Studio
In this tutorial for C# development with ASP.NET Core using Visual Studio, you'll create a C# ASP.NET Core web app, make changes to it, explore some features of the IDE, and then run the app.
Prerequisites
Install Visual Studio
If you haven't already installed Visual Studio, go to the Visual Studio downloads page to install it for free.
Update Visual Studio - If you've already installed Visual Studio, make sure that you're running the most recent release. For more information about how to update your installation, see the Update Visual Studio to the most recent release page.
Choose your theme (optional) - This tutorial includes screenshots that use the dark theme. You can Personalize the Visual Studio IDE and Editor page to learn how.
Create a project
First, you'll create a ASP.NET Core project. The project type comes with all the template files you'll need for a fully functional website, before you've even added anything!
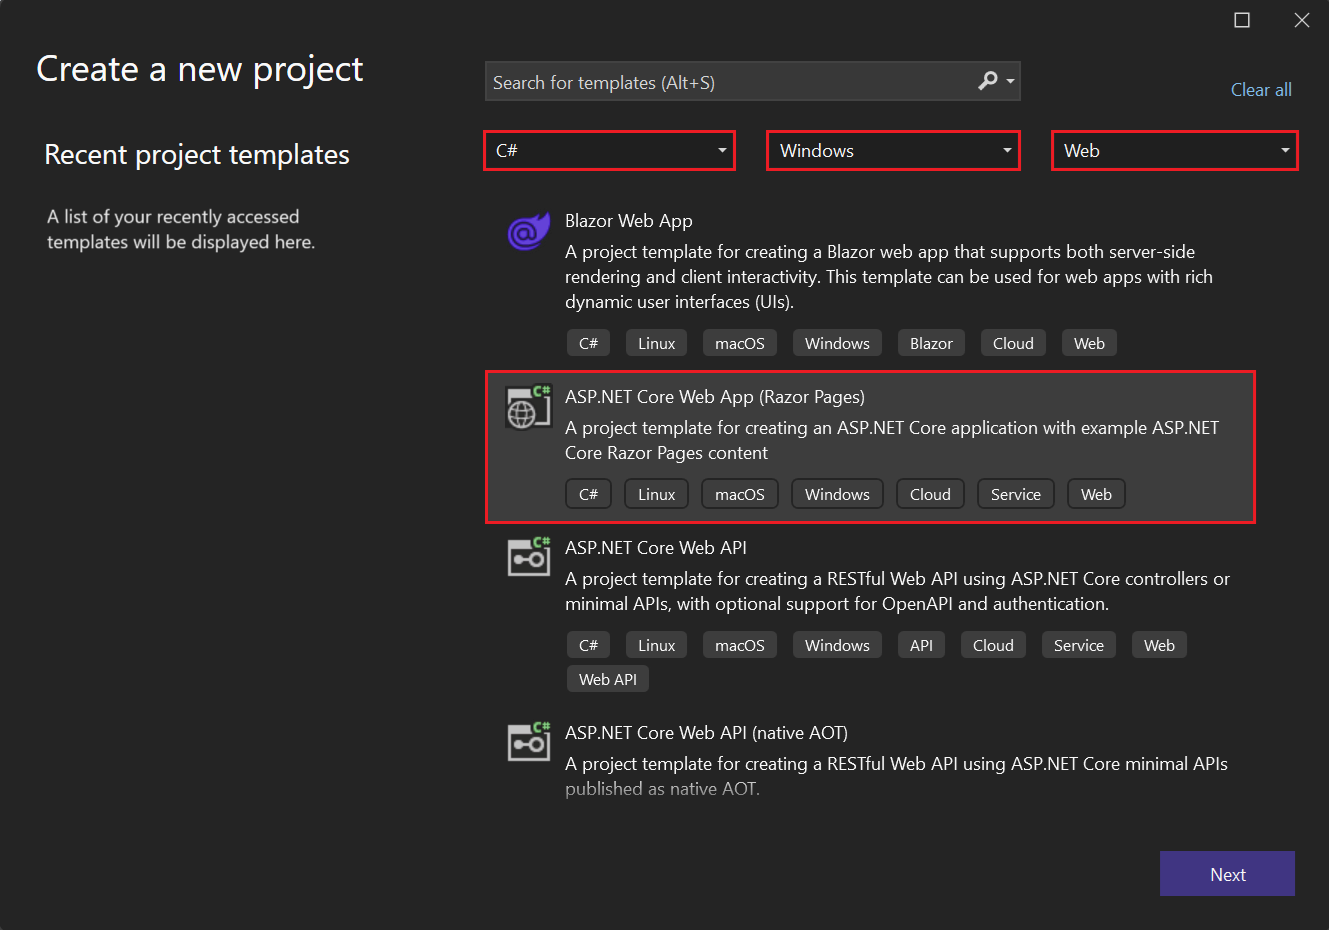
In the start window, choose Create a new project.

In the Create a new project window, choose C# from the Language list. Next, choose Windows from the Platform list, and Web from the project types list.
After you apply the language, platform, and project type filters, choose the ASP.NET Core Web App template, and then choose Next.
Note
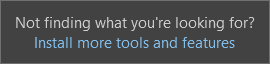
If you don't see the ASP.NET Core Web App template, you can install it from the Create a new project window. In the Not finding what you're looking for? message, choose the Install more tools and features link.
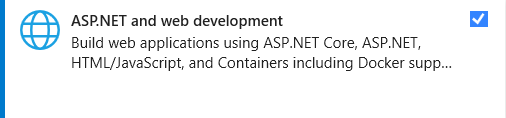
Then, in the Visual Studio Installer, choose the ASP.NET and web development workload.
After that, choose the Modify button in the Visual Studio Installer. If you're prompted to save your work, do so. Next, choose Continue to install the workload. Then, return to step 2 in this "Create a project" procedure.
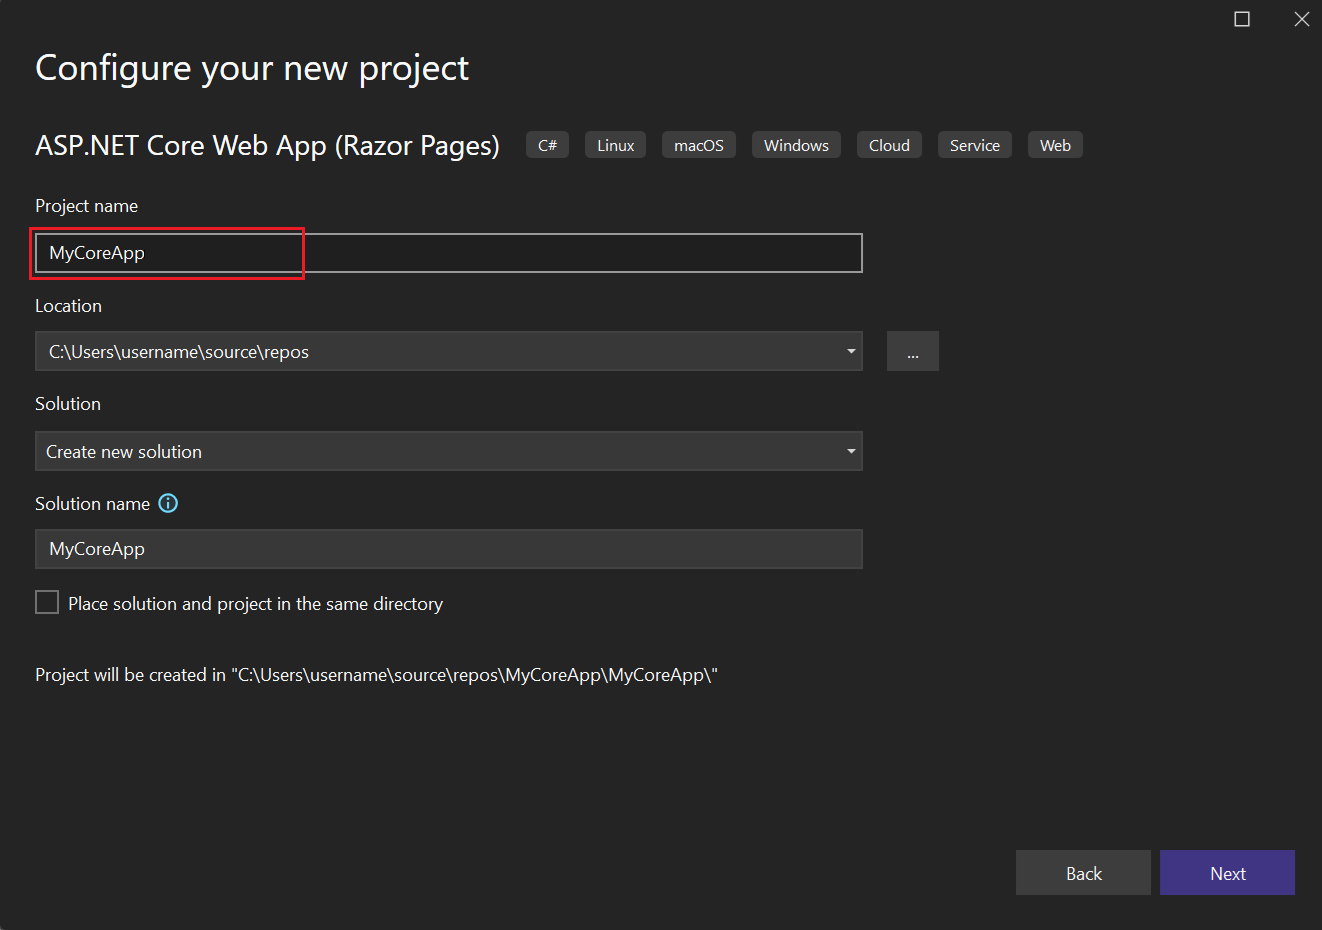
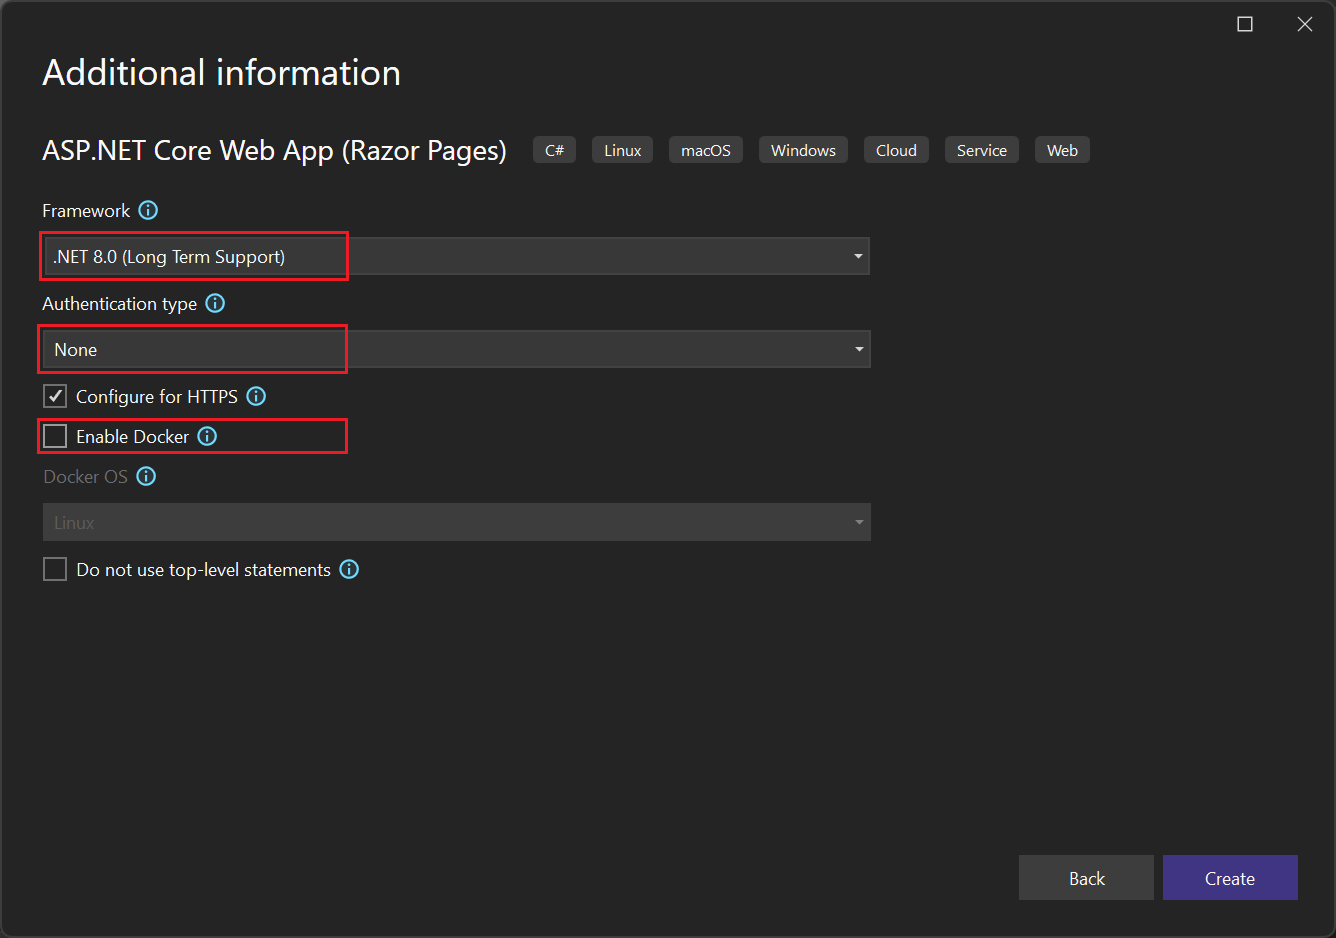
In the Configure your new project window, type or enter MyCoreApp in the Project name box. Then, choose Next.
In the Additional information window, verify that .NET 6.0 appears in the Framework field. In this window, you can choose to enable Docker support by checking the box. You can also add authentication support by selecting a value from the Authentication type drop-down list. From there you can choose from:
- None: no authentication.
- Individual accounts: authentications that are stored in a local or Azure-based database.
- Microsoft identity platform: this option uses Active Directory, Azure AD, or Microsoft 365 for authentication.
- Windows: suitable for intranet applications.
Leave the Enable Docker box unchecked, and select None for Authentication type. Then, select Create.
Visual Studio will open up your new project.
About your solution
This solution follows the Razor Page design pattern. It's different than the Model-View-Controller (MVC) design pattern in that it's streamlined to include the model and controller code within the Razor Page itself.
Tour your solution
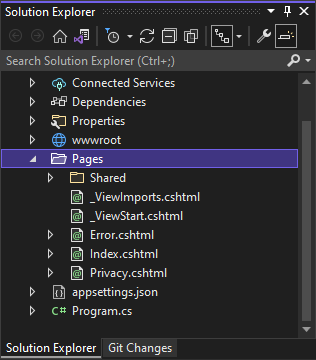
The project template creates a solution with a single ASP.NET Core project that is named MyCoreApp. Choose the Solution Explorer tab to view its contents.

Expand the Pages folder.
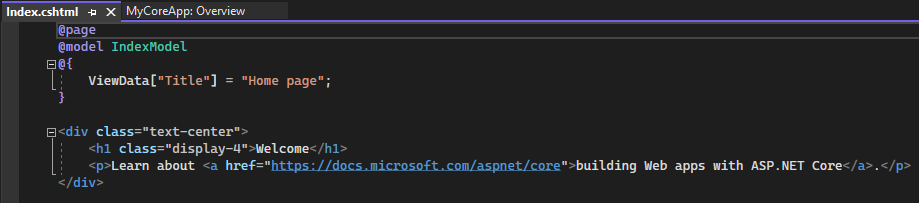
View the Index.cshtml file in the code editor.
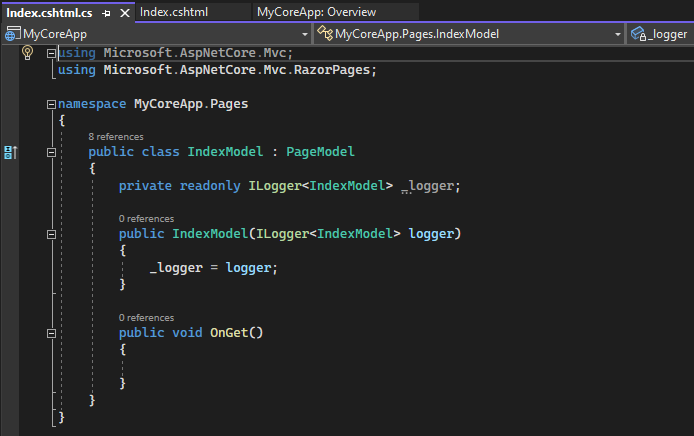
Each .cshtml file has an associated code file. To open the code file in the editor, expand the Index.cshtml node in Solution Explorer, and choose the Index.cshtml.cs file.

View the Index.cshtml.cs file in the code editor.
The project contains a wwwroot folder that is the root for your website. Expand the folder to view its contents.
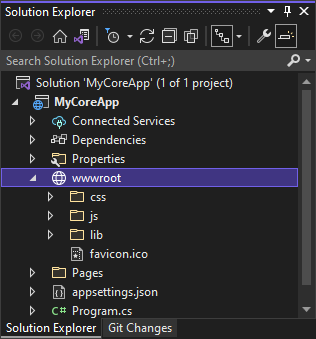
You can put static site content—such as CSS, images, and JavaScript libraries—directly in the paths where you want them.
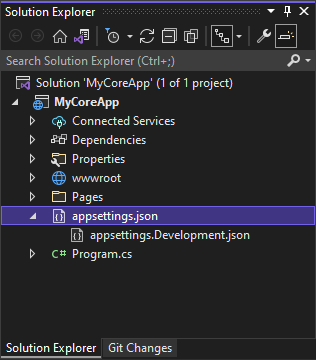
The project also contains configuration files that manage the web app at run time. The default application configuration is stored in appsettings.json. However, you can override these settings by using appsettings.Development.json. Expand the appsettings.json file to view the appsettings.Development.json file.
Run, debug, and make changes
Select the IIS Express button in the IDE to build and run the app in Debug mode. (Alternatively, press F5, or choose Debug > Start Debugging from the menu bar.)

Note
If you get an error message that says Unable to connect to web server 'IIS Express', close Visual Studio and then open it by using the Run as administrator option from the right-click or context menu. Then, run the application again.
You might also get a message that asks if you want to accept an IIS SSL Express certificate. To view the code in a web browser, choose Yes, and then choose Yes if you receive a follow-up security warning message.
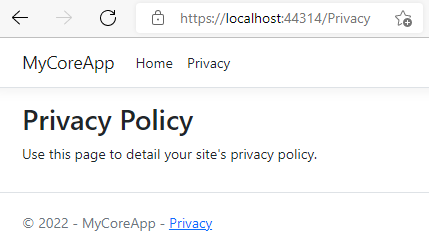
Visual Studio launches a browser window. You should then see Home, and Privacy pages in the menu bar.
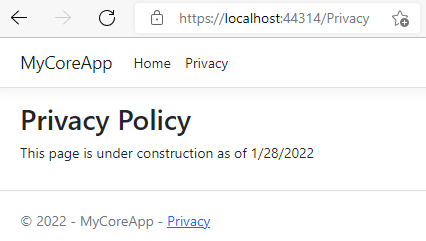
Choose Privacy from the menu bar.
The Privacy page in the browser renders the text that is set in the Privacy.cshtml file.
Return to Visual Studio, and then press Shift+F5 to stop Debug mode. This also closes the project in the browser window.
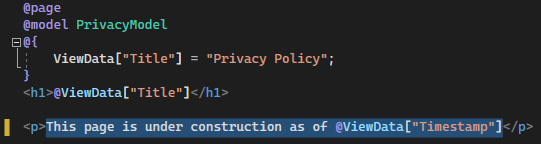
In Visual Studio, open Privacy.cshtml for editing. Then, delete the words Use this page to detail your site's privacy policy and in its place, add the words This page is under construction as of @ViewData["TimeStamp"].
Now, let's make a code change. Choose Privacy.cshtml.cs. Then, clean up the using directives at the top of the file by selecting the following shortcut:
Choose any of the grayed-out using directives and a Quick Actions light bulb will appear just below the caret or in the left margin. Choose the light bulb, and then hover over Remove unnecessary usings.
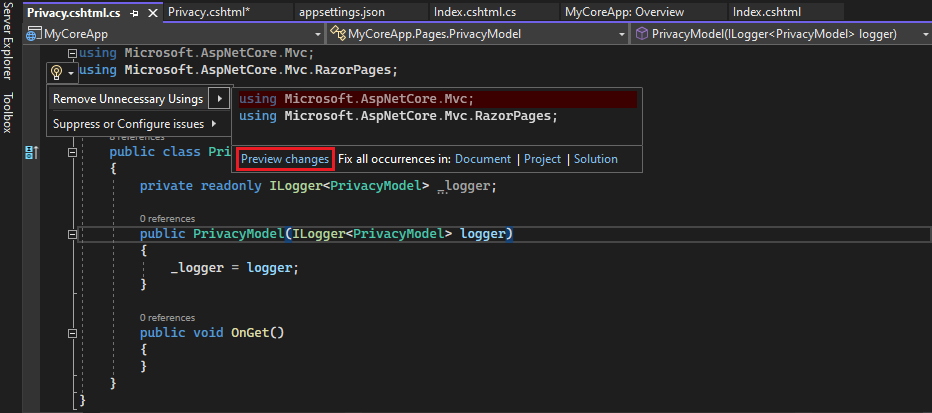
Now choose Preview changes to see what will change.

Choose Apply. Visual Studio deletes the unnecessary using directives from the file.
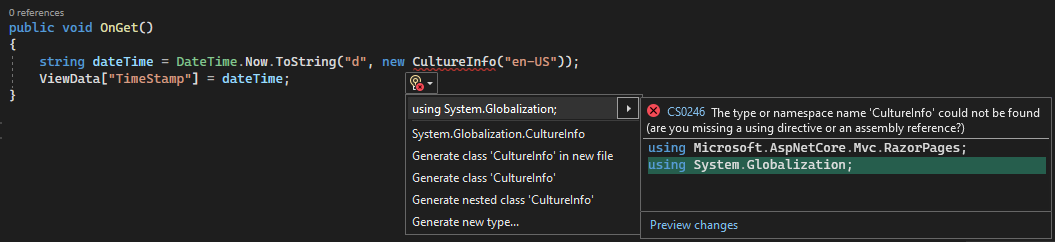
Next, create a string for the current date that is formatted for your culture or region by using the DateTime.ToString method.
- The first argument for the method specifies how the the date should be displayed. This example uses the format specifier (d) which indicates the short date format.
- The second argument is the CultureInfo object that specifies the culture or region for the date. This argument determines, among other things, the language of any words in the date, and the type of separators used.
Change the body of the OnGet() method to the following code:
public void OnGet()
{
   string dateTime = DateTime.Now.ToString("d", new CultureInfo("en-US"));
   ViewData["TimeStamp"] = dateTime;
}
Notice that two wavy underlines appear under CultureInfo. The wavy underlines appear because this type isn't in scope.

Open the Error List toolbar to see the same errors listed there. (If you don't see the Error List toolbar, choose View > Error List from the top menu bar.)

Let's fix this. In the code editor, place your cursor on either line that contains the error, and then choose the Quick Actions light bulb in the left margin. Then, from the drop-down menu, choose using System.Globalization; to add the directive to the top of your file and resolve the errors.
Press F5 to open your project in the web browser.
At the top of the web site, choose Privacy to view your changes.
Close the web browser, press Shift+F5 to stop Debug mode, and then close Visual Studio.
Quick answers FAQ
Here's a quick FAQ to highlight some key concepts.
What is C#?
C# is a type-safe and object-oriented programming language that's designed to be both robust and easy to learn.
What is ASP.NET Core?
ASP.NET Core is an open-source and cross-platform framework for building internet-connected applications, such as web apps and services. ASP.NET Core apps can run on either .NET Core or the .NET Framework. You can develop and run your ASP.NET Core apps cross-platform on Windows, Mac, and Linux. ASP.NET Core is open source at GitHub.
What is Visual Studio?
Visual Studio is an integrated development suite of productivity tools for developers. Think of it as a program you can use to create programs and applications.
Next steps
Congratulations on completing this tutorial! We hope you learned a little bit about C#, ASP.NET Core, and the Visual Studio IDE. To learn more about creating a web app or website with C# and ASP.NET, continue with the following tutorial:
Or, learn how to containerize your web app with Docker:
See also
Publish your web app to Azure App Service by using Visual Studio


