
 Wajdi Alkayal


Whether you are a newbie or an expert in the programming space, you‘ve probably wondered how others developers set up and configure their starting project application.
This article tackles an efficient and intelligent way to set up a production-ready application. We will look into how to set up a MERN Stack application with tools, frameworks and modules that will allow us to manage the performance, styling, asynchrony, and other essential stuff we need to build a real-world application.
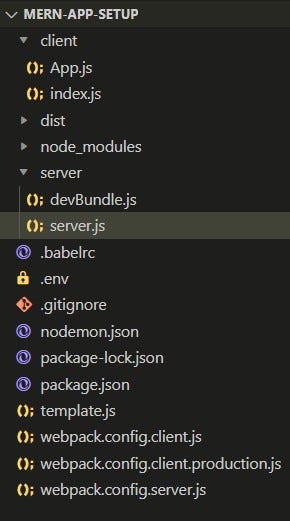
Project Structure

Initializing package.json and installing Node.js modules.
First, create a new folder called mern-app-setup. Enter this folder and initialize our full stack application by entering and running this command in your terminal the command:
npm initYou will be asked a series of questions to gather meta-information about our project such as name, author and license. Then a package.json file will be auto generated with your answers and meta-information about the application as well as list of modules dependencies.
Alternatively, you can also initialize it using yarn init if you are using yarn package manager. Before running theses commands make sure that you have already installed the latest Node.js , npm or yarn on your local machine. Click on each of those links to know more about the process.
Now, let us install all the necessary dependencies and devDependencies that we need. Open package.json file and modify the JSON object to add the key modules and dependencies.
Dependencies:
"dependencies": {
"@hot-loader/react-dom": "^17.0.1",
"express": "^4.17.2",
"react": "^17.0.2",
"react-dom": "^17.0.2",
"react-hot-loader": "^4.13.0"
},
DevDependencies: Modify package.json further to add the following Node modules required during development as devDependencies:
"devDependencies": {
"@babel/core": "^7.16.5",
"@babel/preset-env": "^7.16.5",
"@babel/preset-react": "^7.16.5",
"babel-loader": "^8.2.3",
"nodemon": "^2.0.15",
"webpack": "^5.65.0",
"webpack-cli": "^4.9.1",
"webpack-dev-middleware": "^5.3.0",
"webpack-hot-middleware": "^2.25.1",
"webpack-node-externals": "^3.0.0"
}
Save the package.json and run npm install from the command line to fetch and add all these modules to the project. With all the necessary modules installed and added to the project, next we will add configuration to compile and run a simple application.
Note that you can also install all these modules manually on the command line and work with the latest versions modules dependencies but we use this method just in case you will be reading this article a year or two years from now, so you will have the same code base and modules versions here in case you want to follow along with us.
Configuring Babel, Webpack and Nodemon
Now, we will configure our application with Babel, Webpack and Nodemon to compile, bundle and auto-reload the changes in the code during the development. Before diving to these configurations, let us learn a few things about each module.
What is Babel?
Babel is a JavaScript transcompiler that converts edge JavaScript into plain old ES5 JavaScript that can run in any browser (even the old ones). It makes available all the syntactical sugar that was added to JavaScript with the new ES6 specification, including classes, fat arrows and multiline strings.
What is Webpack?
Webpack is a JavaScript code bundler that traverses the dependency graph of your project (chain of imports you use in your JS files), and creates a static JavaScript file(s) that is ready to be attached to your HTML.
Configuring Babel
Create a file named .babelrc in the root directory of the project and add the following JSON with presets and plugins specified:
mern-app-setup/.babelrc
{
  "presets": [
    ["@babel/preset-env",
  {
    "targets": {
      "node": "current"
    }
  }
  ],
    "@babel/preset-react"
  ],
  "plugins": [
    "react-hot-loader/babel"
    ]
}
In this configuration, we specify that we need Babel to transpile the latest JavaScript syntax with support for code in a Node.js environment and also React/JSX code. The react-hot-loader/babel plugin is required by the react-hot-loader module to compile React components.
Configuring Webpack
First, we will have to configure Webpack to bundle both the client and server code and the client code separately for production.
Create webpack.config.client.js, webpack.config.server.js, and webpack.config.client.production.js files in the project folder.
All three files will have the following code structure, starting with imports, then the definition of the config object, and finally the export of the defined config object:
const path = require('path')
const webpack = require('webpack')
const CURRENT_WORKING_DIR = process.cwd()
const config = { ... }
module.exports = config
The config JSON object will differ with value specific to client or server-side code, and development versus production code.
In the next sections, we will underline the relevant properties in each configuration instance.
Client Side webpack configuration for development
const config={
name: 'browser',
mode: 'development',
devtool: 'eval-source-map',
entry: [
'webpack-hot-middleware/client?reload=true',
path.join(CURRENT_WORKING_DIR,'client/index.js')
],
output:{
path: path.join(CURRENT_WORKING_DIR, '/dist'),
filename: 'bundle.js',
publicPath: '/dist/'
},
module:{
rules: [
{
test: /\.jsx?$/,
exclude: /node_modules/,
use: ['babel-loader']
}
]
},
plugins: [
new webpack.HotModuleReplacementPlugin(),
new webpack.NoEmitOnErrorsPlugin()
],
resolve:{
alias:{
'react-dom': '@hot-loader/react-dom'
}
}
}
Now, let us explain each property and method added in this file:
- The name property defines which kind of environment our code will run in. Here we are setting up webpack to bundle the client-side code, so we need to specify browser.
- The mode sets the node environment to the given value and tells webpack to use its built-in optimizations accordingly. If not set explicitly it defaults to a value of “production”.
- The Devtool specifies how source maps are generated, if at all. Generally, a source map provides a way of mapping code within a compressed file back to its original position in a source file to aid debugging.
- The entry point indicates which modules webpack should use to start bundling, in this case with the main.js in the client folder.
- The output property tells webpack where to emit the bundles it creates and how to name these files. In this case, it sets to dist/bundle.js.
- The module property allow webpack to process other types of files and convert them into valid modules that can be consumed by our application and added to the dependency graph.
- At high level , Loaders have two properties: test and use. The test property identifies which file or files should be transformed and the use indicates which loader should be used to do the transforming. In our case, we choose to transpile all files with .jsx extensions , and the transpilation tool that we used is babel-loader.
- HotModuleReplacementPlugin enables hot module replacement for react-hot-loader.
- NoEmitOnErrorsPlugin allows skipping emitting when there are compile errors.
We also add a Webpack alias to point react-dom references to the @hot-loader/react-dom version.
Now, our client-side configuration code is ready to be loaded in the browser from the bundled code in bundle.js. In the next section, we will configure webpack for production.
Client side webpack configuration for production
In order to bundle the React code to be used in production mode, we need to set up webpack for production by updating the config object with following code:
mern-app-setup/webpack.config.client.production.js
const config = {mode: 'production',entry: [path.join(CURRENT_WORKING_DIR, 'client/index.js')],output: {path: path.join(CURRENT_WORKING_DIR, '/dist'),filename: 'bundle.js',publicPath: '/dist/',},module: {rules: [{test: /\.jsx?$/,exclude: /node_modules/,use: ['babel-loader'],},],},};
The configuration here is similar to the client-side configuration for development mode, but without the hot-reloading plugin and debug configuration as these will not be required in production.
Server-side webpack configuration
In order to configure webpack for server-side, update the webpack.config.server.js by adding the following code:
mern-app-setup/webpack.config.server.js
const nodeExternals=require('webpack-node-externals');const config={
name: 'server',
entry: [path.join(CURRENT_WORKING_DIR, './server/server.js')],
target: "node",
output:{
path: path.join(CURRENT_WORKING_DIR, '/dist/'),
filename: 'server.generated.js',
publicPath: '/dist/',
libraryTarget: 'commonjs2'
},
externals: [nodeExternals()],
module: {
rules: [
{
test: /\.js$/,
exclude: /node_modules/,
use: [ 'babel-loader' ]
}
]
}
}
The code inside this file has the same structure as the webpack.config.client.js. But here we have not defined the mode option and add some additional properties like: libraryTarget and externals.
Webpack starts bundling from the server folder with server.js, then outputs the bundled code in server.generated.js in the dist folder. Now, with the bundling configurations in place, we can add configuration for running these generated bundles automatically on code updates during development using Nodemon.
Configuring Nodemon
Create a file called nodemon.json in the folder project and add the following configuration:
mern-app-setup/nodemon.json
{
"verbose": false,
"watch": [ "./server" ],
"exec": "webpack --mode=development --config webpack.config.server.js && node ./dist/server.generated.js"
}
This configuration will set up nodemon to watch automatically for changes in the server files during development, then execute compile and build commands as necessary.
Now, we have finished to configure Webpack and Babel. Let’s verify if the configuration is well done by building a simple full stack application.
Frontend views with React
In order to start building the frontend of our application, let’s create a root template file called template.js in the root directory of our project, which will render the HTML with React components.
Add the following code in this file: mern-app-setup/template.js:
export default () => {
return `<!doctype html>
<html lang="en">
<head>
<meta charset="utf-8">
<title>Set up full stack MERN application</title>
</head>
<body>
<div id="root"></div>
<script type="text/javascript" src="/dist/bundle.js">
</script>
</body>
</html>`
}
When the server receives a request to the root URL, this HTML template will be rendered in the browser, and the div element with ID “root” will contain our React component. Next, create a folder called client . Inside this folder, create two files: index.js and App.js.
The index.js file simply renders the top-level entry React component in the div element in the HTML document:
mern-app-setup/client/index.js
import React from 'react'
import { render } from 'react-dom'
import App from ‘./App'render(<App/>, document.getElementById('root'))
In this case, the entry React component is the App component imported from App.js:
mern-app-setup/client/App.js
import { hot } from 'react-hot-loader/root';
const App=()=>{
return (
<div>
Hello! We are setting up a real world application!
</div>
)
}
export default hot(App) ;
The App.js file contains a basic App React component, which is hot-exported to enable hot reloading with react-hot-loader during the development.
In order to see the React component rendered in the browser when the server receives a request to the root URL, we need to use the webpack and Babel setup to compile and bundle this code, and also add server-side code that responds to the root route request with the bundled code. We will implement this in the server-side next.
Server with Node and Express
In the project folder, create a new folder called server. Inside this folder two files called: server.js, devBundle.js. The server.js file will set up the server and the devBundle.js file will help to compile the React code using the webpack configuration while in the development mode.
Now, let us implement the Node-express app which initiates client-side code bundling, starts the server, sets up the path to serve static assets to the client, and renders the React view in a template when a GET request is made to the root route.
In order to initialize our Express app, we will first import the Express module and then use this Express app to build the rest of the application. The resume code looks like this:
mern-app-setup/server/server.js
import express from 'express'
const app = express()
Bundling React app during the development
Next, we will initialize webpack to compile the client-side code when the server is running. In devBundle.js, we will set up a compile method that takes the Express app and configures it to use the Webpack middleware to compile, bundle, and serve code, as well as enable hot reloading in development mode:
mern-app-setup/server/devBundle.js
import webpack from 'webpack'
import webpackMiddleware from 'webpack-dev-middleware'
import webpackHotMiddleware from 'webpack-hot-middleware'
import webpackConfig from './../webpack.config.client.js'
import dotenv from 'dotenv';
dotenv.config();const compile = (app) => {
if(process.env.NODE_ENV == "development"){
const compiler = webpack(webpackConfig)
const middleware = webpackMiddleware(compiler, {
publicPath: webpackConfig.output.publicPath
})
app.use(middleware)
app.use(webpackHotMiddleware(compiler))
}
}export default {
compile
}
We have imported another module called dotenv in order to load our environment variables from a .env file into process.env. Install it by running npm install dotenv from the command line.
Now, let us call this compile method in server.js by adding the following lines while in the development mode:
mern-app-setup/server/server.js
import devBundle from './devBundle'
const app = express()
devBundle.compile(app)
Serving static files from the dist folder
Webpack will compile client-side code in both development and production mode, then place the bundled files in the dist folder. In order to make these static files available on requests from the client side, we will update our server.js file to serve static files from the dist folder:
mern-app-setup/server/server.js
import path from 'path'
const CURRENT_WORKING_DIR = process.cwd()
app.use('/dist', express.static(path.join(CURRENT_WORKING_DIR, 'dist')))
Rendering templates at the root
When the server receives a request at the root URL / , we will render template.js in the browser. In order to receive GET requests as ‘/’, go to server.js and add the following route-handling code to the Express app:
import template from './../template'
app.get('/', (req, res) => {
res.status(200).send(template())
})
Now let us finalize the server-side app by configuring the Express app to start a server that listens on the specified port for incoming requests:
let port = process.env.PORT || 3000
app.listen(port, (err) =>{
if (err) {
console.log(err)
}
console.info('Server started on port %s.', port)
})
With this code, when the server is running, it will be able to accept requests at the root route and render the React view with the “Hello! We are setting up a real-world application!” text in the browser.
We have finished to configure our MERN Stack application. Now we need to add some scripts in the package.json file so that we can run the application.
mern-app-setup/package.json
"scripts": {
"development": "nodemon",
"build": "webpack --config webpack.config.client.production.js && webpack --mode=production --config webpack.config.server.js",
"start": "NODE_ENV=production node ./dist/server.generated.js"
} ,
To run the code developed so far, and to ensure that everything is working, you can go through the following steps:
- Run the application from the command line using npm run development to get Nodemon , Webpack and server started for development. After, open the root URL in the browser which is http://localhost:3000 if you are using your local machine. You should see a page with the text: “Hello! We are setting up a real world application!”
- Run the application from the command line using npm run build to generate the client and server code bundles for production mode.
- Run the application from the command line using npm start to run the bundled code in production.
Conclusion
We have finished setting up our MERN application with Webpack , Babel and Nodemon. But we have not implemented a way to improve our code quality and avoid errors. You can make it by using Prettier and Eslint. Read this articles to have an idea about the process to do this.


WMK Tech Copyright © 2024. All rights reserved

